
The Lasker Trap: the Albin Countergambit's knight underpromotion
How 4.e3? loses the queen in the Albin Countergambit: the Lasker Trap move by move, why the pawn promotes to a knight, and how White avoids it.
6 min readBy Hasan Süzen
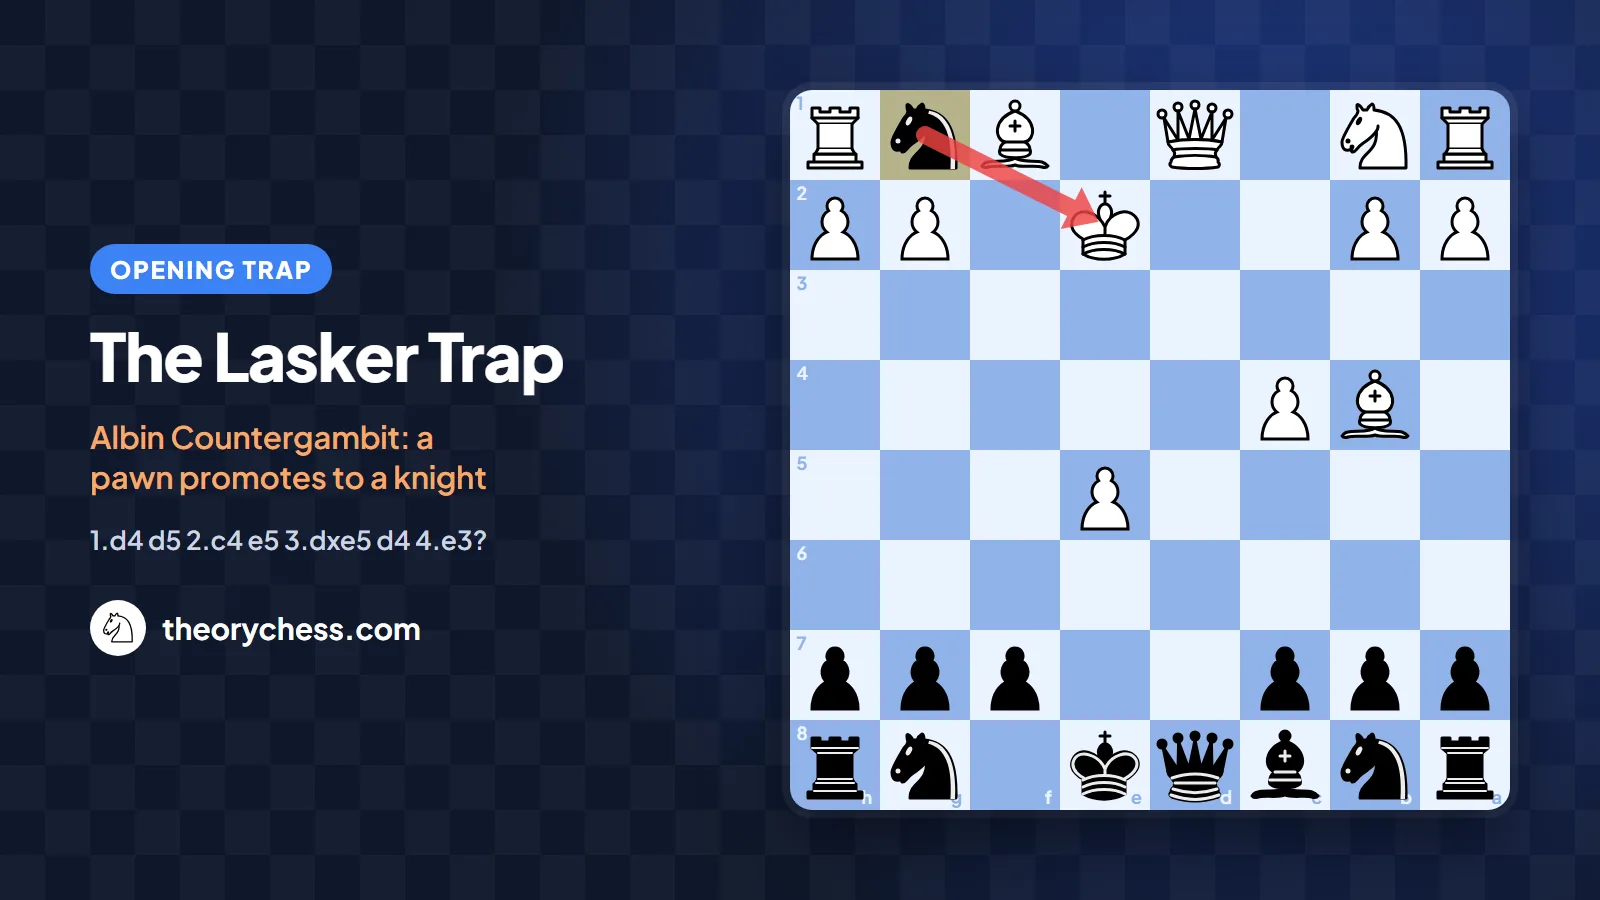
The Lasker Trap is a famous opening trap in the Albin Countergambit (1.d4 d5 2.c4 e5) in which Black punishes the natural-looking 4.e3? by promoting a pawn to a knight with check. The main line runs 1.d4 d5 2.c4 e5 3.dxe5 d4 4.e3? Bb4+ 5.Bd2 dxe3! 6.Bxb4?? exf2+ 7.Ke2 fxg1=N+! 8.Rxg1 Bg4+, and White loses the queen. It is one of the best-known examples of an underpromotion within the first ten moves of a game.
In this guide we go through the trap move by move, explain why it works, and draw the practical lessons for both sides. Named after world champion Emanuel Lasker, it is a position every Albin player should know by heart and every Queen’s Gambit player should recognise before it is too late.
The idea behind the Albin Countergambit
Against the Queen’s Gambit Black usually builds a solid structure with 2…e6 or 2…c6. The Albin does the opposite: 2…e5!? gives up a pawn and strikes back in the centre at once. After 3.dxe5 d4 the pawn on d4 becomes a bone in White’s throat. It controls e3 and c3, cramps White’s natural development, and in fast games it can be very dangerous.
White’s most natural reaction is to get rid of that annoying pawn straight away. That is exactly where 4.e3? comes to mind, and where the Lasker Trap opens.
The Lasker Trap move by move
4.e3? Bb4+ 5.Bd2
4.e3? attacks the d4 pawn and seems to clear up the centre. But the moment the e-pawn moves, the e1-h4 diagonal and the f2 square become weak. Black first checks with 4…Bb4+, and White blocks with the most natural move, 5.Bd2.
5…dxe3! and 6.Bxb4??
Black does not bother to save the bishop. 5…dxe3! pushes the pawn into e3, attacking both the bishop on d2 and the f2 pawn. White’s instinct says “the bishop is hanging, take it”, and 6.Bxb4?? is the move that loses the game.
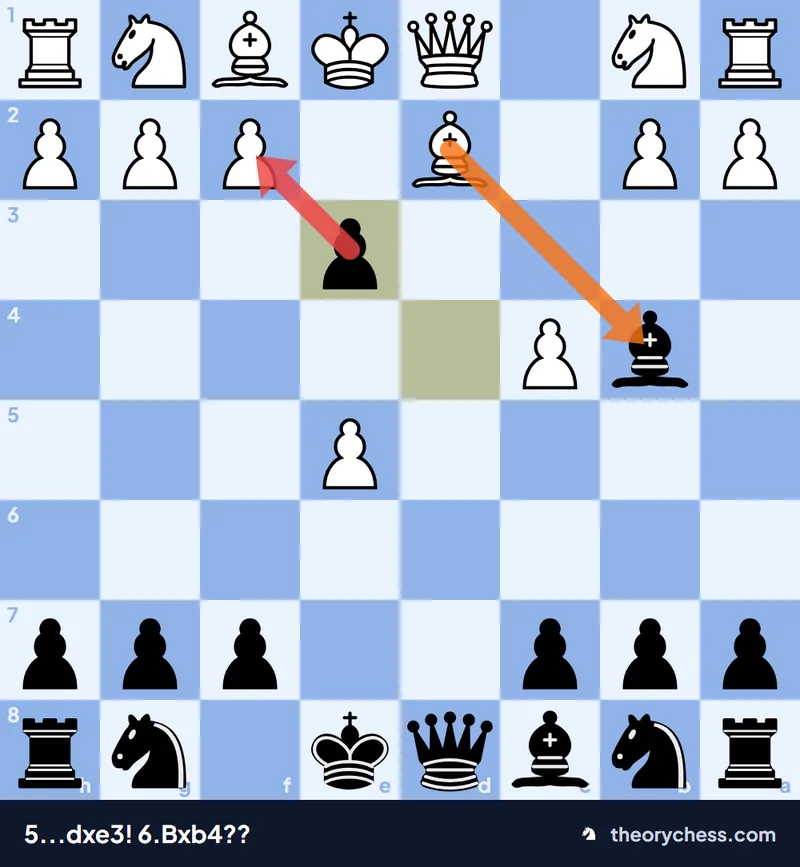
After 5…dxe3!: the pawn on e3 eyes f2. 6.Bxb4?? looks perfectly natural, yet it loses.
6…exf2+ 7.Ke2
6…exf2+! The pawn reaches f2 with check. If 7.Kxf2, the d-file is completely open and 7…Qxd1 wins the queen on the spot. So White’s only sensible move is 7.Ke2. With the king on e2, White may even feel relieved: the f2 pawn can take on g1 and promote, but surely the new queen will just be captured?
7…fxg1=N+!! The knight promotion
This is the beautiful moment. Black captures on g1 and promotes, but chooses a knight rather than a queen: 7…fxg1=N+!. The knight on g1 checks the king on e2. A new queen would not give check, and White could play something like 8.Qa4+, moving the queen off d1 with check and killing the idea that follows. The knight promotion leaves White no time: the king must move or the knight must be taken.
8.Rxg1 Bg4+ wins the queen
White takes the knight with 8.Rxg1, and now comes 8…Bg4+!. The c8 bishop checks the king on e2 and skewers the queen on d1 behind it. There is nothing to block with, so once the king steps aside, 9…Bxd1 collects the queen. Black is clearly ahead in material, and White’s king is still stuck in the middle of the board.
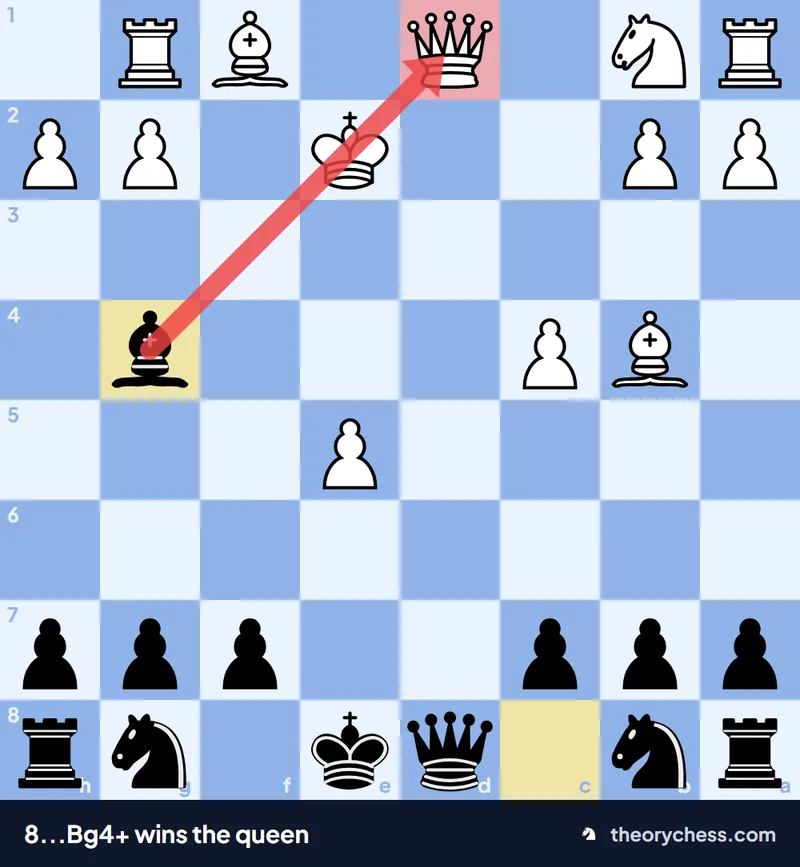
8…Bg4+: the bishop checks the king and wins the queen behind it. The Lasker Trap is complete.
Move-by-move summary
| Move | Side | What happens |
|---|---|---|
| 4.e3? | White | Attacks d4 but weakens f2 and the e1-h4 diagonal. |
| 4…Bb4+ | Black | Check, steering White into 5.Bd2. |
| 5…dxe3! | Black | Ignores the bishop; the pawn hits d2 and f2. |
| 6.Bxb4?? | White | Grabs the free bishop: the losing mistake. |
| 6…exf2+ | Black | Check; 7.Kxf2 Qxd1 forces 7.Ke2. |
| 7…fxg1=N+! | Black | Promotes to a knight with check. |
| 8…Bg4+ | Black | King and queen on one diagonal; the queen falls. |
Why the trap works so well
- Every White move looks sensible. 4.e3 attacks the centre, 5.Bd2 blocks the check, 6.Bxb4 grabs a free piece. Each mistake looks harmless on its own.
- The open d-file. Black’s d-pawn has marched to e3 and then f2, so the queen on d8 sees all the way to d1. That is what makes 7.Kxf2 impossible.
- Underpromotion is unusual. Most players only think about promoting to a queen. A knight promotion with check is rarely part of the opponent’s calculation.
- Geometry. Once the king is on e2 and the queen on d1, they stand on the same diagonal, and a single bishop move creates the skewer.
How White avoids the Lasker Trap
The real mistake is not 6.Bxb4 but 4.e3?, two moves earlier. The main line of the Albin Countergambit is 4.Nf3!. The knight develops, puts pressure on the d4 pawn, indirectly holds the e5 pawn, and gets White’s kingside ready to castle. Typical play continues 4…Nc6 5.g3 or 5.a3; White fianchettoes the bishop on g2, while Black looks for counterplay with …Be6 or …Bg4, …Qd7 and long castling.
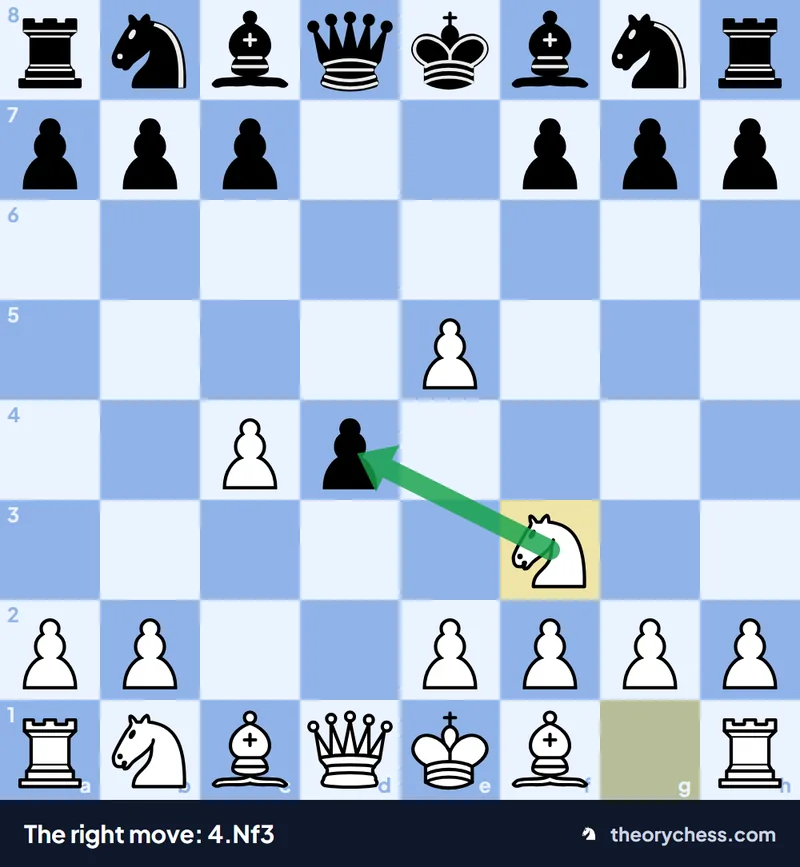
The right path is 4.Nf3: White develops, presses d4, and never walks into the Lasker Trap.
If White has already played 4.e3, the key is to stay calm after 5…dxe3. 6.fxe3! recaptures the pawn instead of the bishop. Black can bring the queen out with 6…Qh4+ 7.g3 and then try moves like …Qe4, hitting e3 and the rook on h1. White’s structure is weakened, but the game goes on with no material lost. The lesson is simple: never reach for a free piece before you have checked what a pawn giving check can do.
Practical lessons for Black
- If you play the Albin, make 4…Bb4+ against 4.e3? an automatic reflex. The position comes up surprisingly often at club level and in blitz.
- If your opponent knows 4.Nf3, the game turns into a normal gambit position. The trap should not be your only plan, so study the standard ideas too: …Nc6, …Be6 and queenside castling.
- Whenever you promote, ask yourself: “does a piece other than the queen give check or fork something?” The Lasker Trap is the best-known answer to that question.
Similar traps
The Lasker Trap is a typical short opening trap in which a natural-looking move is punished at once. You will find the same logic in the Englund Gambit trap against 1.d4 and in the Blackburne Shilling trap in the Italian Game. For a broader list, see opening traps every club player should know, and for the solid main lines of the Queen’s Gambit, read Queen’s Gambit: accepted or declined?
Frequently asked questions
In which opening does the Lasker Trap occur?
In the Albin Countergambit against the Queen’s Gambit: 1.d4 d5 2.c4 e5 3.dxe5 d4 4.e3?.
Why does Black promote to a knight instead of a queen?
Because the knight on g1 gives check to the king on e2. A queen would not give check and would hand White a tempo. The knight promotion forces 8.Rxg1 and makes the 8…Bg4+ skewer possible.
What is White’s best move?
The main line is 4.Nf3. Even after 4.e3, White escapes with 6.fxe3; the losing move is 6.Bxb4??.
Is the Albin Countergambit a sound opening?
It is rare at the top level, and against accurate play Black can struggle to get full value for the pawn. At club level and in fast time controls, though, it is an effective weapon because it forces White to make difficult decisions from the very first moves.
Practise it on TheoryChess
Reading a trap is not enough; it becomes a reflex once you have played the moves yourself a few times. On TheoryChess you can open the Albin Countergambit trainer and play the main lines against Stockfish, then take the Albin Countergambit quiz to see how well the positions have stuck. Browse the full opening catalogue to pick your next opening.
Keep reading
· 5 min read
The Siberian Trap: checkmate on h2 in the Smith-Morra GambitThe Siberian Trap in the Smith-Morra: 8…Ng4! 9.h3?? Nd4! and 10…Qh2#. Move by move, why it works and how White avoids it.
· 5 min read
The Scandinavian Defence: a practical guide to 1.e4 d5The Scandinavian Defence strikes at the centre with 1…d5. Main line 3…Qa5, the alternatives, typical plans and common mistakes.
· 6 min read
The Noah’s Ark Trap: how Black traps the bishop in the Ruy LopezThe Noah’s Ark Trap in the Ruy Lopez, move by move: after 8.Qxd4?? c5! and …c4, White’s b3-bishop is trapped by Black’s pawns. How to set it and avoid it.